Cabinets can quietly shape the entire look of a kitchen or bathroom. When they become faded, scratched, or outdated, the whole space can feel worn even if everything else is in good condition. The good news is that replacing cabinets is not always necessary. San Jose Cabinet Refinishing can restore beauty, improve durability, and create a fresh new look without a full renovation.
What Is Cabinet Refinishing?
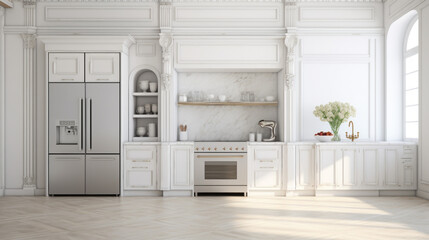
Cabinet refinishing is the process of updating the surface of existing cabinets while keeping the original cabinet structure. It usually involves cleaning, sanding, repairing, priming, painting or staining, sealing, and reassembling the cabinets. This method works best when the cabinets are still strong but need a visual upgrade.
Unlike cabinet replacement, refinishing does not require removing the entire cabinet system. Instead, it focuses on improving the exterior finish. This makes it a practical choice for homeowners who want a modern update without the cost and disruption of a full remodel.
Step 1: Inspecting the Cabinets
The process begins with a detailed inspection of the cabinets. This step helps determine whether the cabinets are suitable for refinishing. Cabinets with strong frames, solid doors, and minor surface wear are usually good candidates.
During inspection, damaged areas such as cracks, peeling finish, loose hinges, or water stains are identified. Any structural issues should be repaired before refinishing begins. This ensures the final result is not only attractive but also long lasting.
Step 2: Removing Doors, Drawers, and Hardware
The next step is removing cabinet doors, drawers, knobs, handles, and hinges. This allows every surface to be refinished evenly. It also prevents paint or stain from getting on hardware and creates a cleaner final appearance.
Labeling each door and drawer is important during this stage. Even cabinets that look identical may fit slightly differently. Proper labeling makes reassembly easier and helps maintain the original alignment.
Step 3: Cleaning and Degreasing
Cabinets must be cleaned thoroughly before any sanding or finishing begins. Kitchen cabinets often collect grease, dust, food residue, and fingerprints over time. If these contaminants are not removed, primer or paint may not adhere properly.
A strong degreasing cleaner is usually used to break down buildup on the surfaces. Corners, edges, and areas around handles need extra attention because they often hold the most residue. Clean cabinets create the foundation for a smooth and durable finish.
Step 4: Sanding the Surfaces
Sanding is one of the most important steps in cabinet refinishing. It removes glossy coatings and creates a slightly rough surface that helps primer and paint bond properly. Without sanding, the new finish may peel or chip more easily.
The goal is not always to remove every layer of the old finish. In many cases, light sanding is enough to prepare the surface. Careful sanding also smooths minor imperfections and helps create a more professional result.
Step 5: Repairing Imperfections
After sanding, any dents, scratches, holes, or damaged edges should be repaired. Wood filler or patching materials may be used to correct surface flaws. Once repairs dry, the areas are sanded smooth so they blend with the surrounding cabinet surface.
This step is especially important when painting cabinets because paint can highlight imperfections. Proper repair work creates a cleaner and more polished final appearance. It also helps the cabinets look refreshed rather than simply covered with a new coating.
Step 6: Applying Primer
Primer helps the new finish adhere properly and creates an even base for paint or stain. It is especially important when changing cabinet colors or painting over dark wood. Primer can also block stains and prevent old finishes from bleeding through.
The primer should be applied in thin, even coats. After it dries, light sanding may be done to smooth the surface before the final finish is added. A high quality primer improves durability and helps the refinished cabinets last longer.
Step 7: Painting or Staining
This is the stage where the transformation becomes visible. Paint creates a fresh, modern look and allows for a wide range of color choices. Stain enhances the natural wood grain and provides a warmer, more traditional appearance.
Multiple thin coats usually produce better results than one heavy coat. Each coat must dry properly before the next is applied. Rushing this step can lead to uneven texture, drips, or poor durability.
Step 8: Sealing and Protecting the Finish
After painting or staining, a protective topcoat may be applied. This sealant helps protect the cabinets from moisture, scratches, grease, and daily wear. It is especially important in kitchens and bathrooms where cabinets are exposed to frequent use.
The type of protective finish depends on the desired appearance and level of durability. Satin and semi gloss finishes are popular because they are easier to clean and maintain. A strong protective coating helps preserve the refinished look for years.
Step 9: Allowing Proper Drying and Curing
Drying and curing are not the same. Cabinets may feel dry within hours, but the finish can take much longer to fully harden. During this curing period, the cabinets should be handled gently to avoid dents, fingerprints, or sticking.
Proper curing improves the strength and durability of the finish. Reinstalling doors too early can damage the surface or cause edges to stick together. Patience during this stage helps ensure a smooth and lasting result.
Step 10: Reinstalling Doors, Drawers, and Hardware
Once the finish has cured, doors, drawers, hinges, and hardware are reinstalled. This is also a good time to upgrade handles or knobs for a more modern look. New hardware can make refinished cabinets feel even more updated.
Everything should be carefully aligned during reassembly. Doors should open smoothly, drawers should slide properly, and hardware should feel secure. A final inspection ensures the cabinets look polished and function correctly.
Conclusion
The cabinet refinishing process is a detailed step by step method that can transform outdated cabinets without full replacement. From inspection and cleaning to sanding, priming, finishing, and reassembly, every stage plays an important role in the final result.
When done properly, cabinet refinishing can create a fresh, durable, and modern appearance while preserving the existing cabinet structure. It is a practical upgrade that improves both style and function. With careful preparation and the right materials, refinished cabinets can remain beautiful and reliable for many years.